Netsuite
How do I connect my inventory with Netsuite?
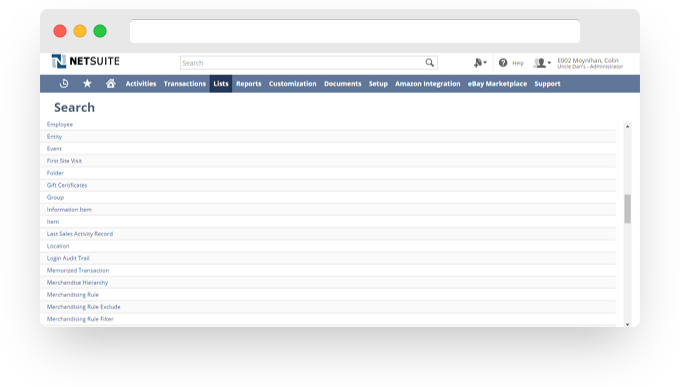
- Create saved search as Item Search.
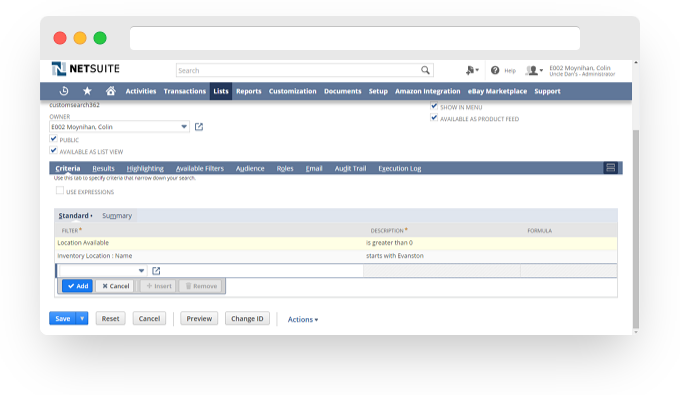
- Set criteria using "location available" greater than 0 to show inventory currently on hand in desired location and use "inventory location: name" to define location.
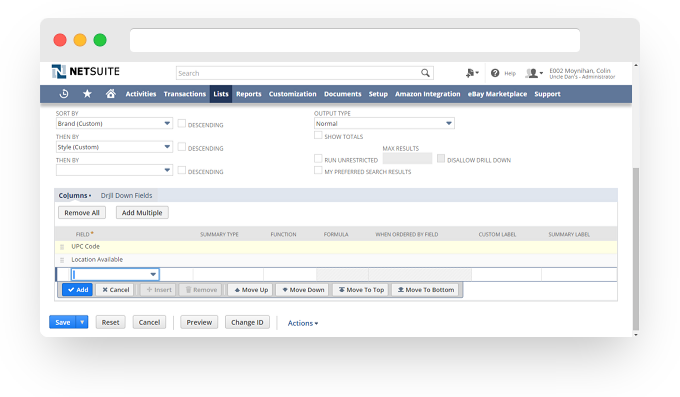
- Set results using "upc code" and "location available" as only results.
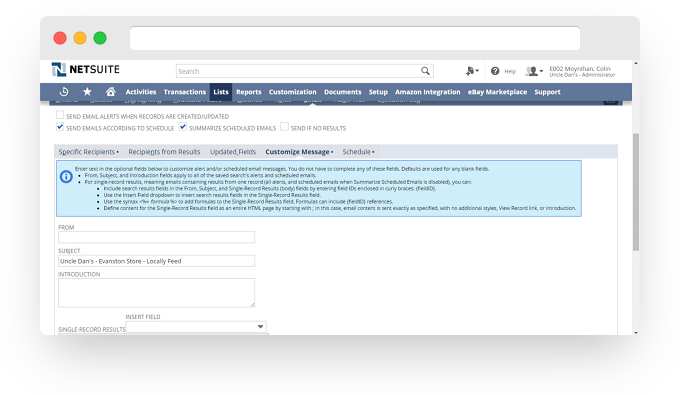
- Go to Email subtab and check boxes "send emails according to schedule" AND "summarize scheduled emails". If you don't select the summarize scheduled emails, emails won't send correctly. Within the "specified recipients" subtab, set recipient as Locally. In order to do this, you must first create a vendor for Locally and enter the email specified by Locally staff in the vendor record. Once this is complete, you can select locally in screen below as the email recipient. Without first creating vendor record for locally, this will not work.
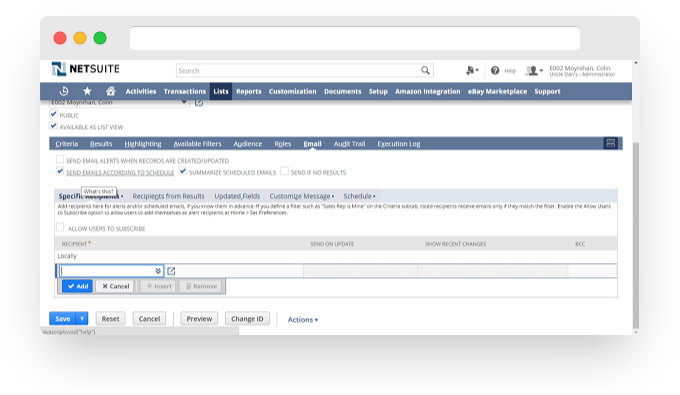
- Under "Customize Message" subtab, enter subject line so that Locally can determine which store the email is pertaining to.
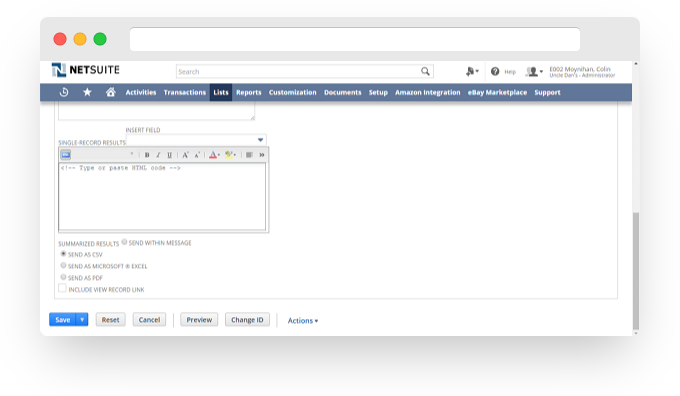
- Under "customize message" subtab, select box to "send as csv."
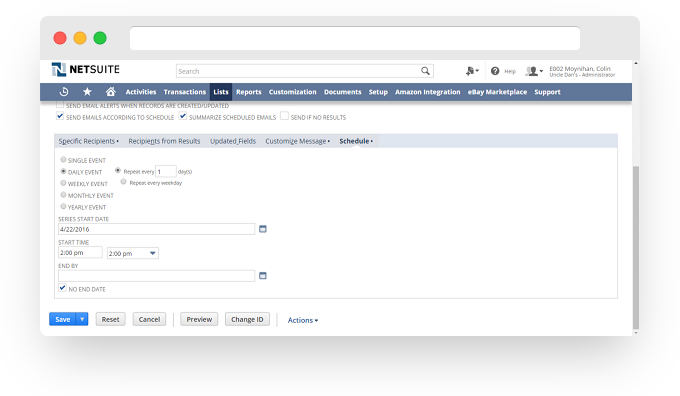
- Under "schedule" subtab, set daily schedule to run. Click blue "save" button and this email schedule should be complete.
- Email [email protected] to let us know that you've set up your inventory report.